The prime rib dinner can be an elegant affair or an overcooked disaster. During my career, my restaurants served over 180,000 pounds of prime rib. While I’ve used different methods and equipment, this is my favorite recipe using readily-available, choice-graded boneless ribeye roasts. If you choose to use bone-in roasts, adjust your cook times accordingly.
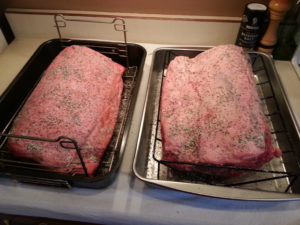
1.) 24 hours before roasting, unpack the rib roast from its cryovac packaging, pat dry with paper towels, and place uncovered in the refrigerator overnight. This allows the excess moisture to evaporate and the outside to dry.
2.) Pull the rib roast out of the refrigerator and let sit for 2 hours (1 hour for a small roast) prior to cooking. This is to take the chill off the beef. Keep loosely covered with plastic wrap.
3.) Preheat your oven to the lowest setting (typically 170 degrees for a residential oven). Ovens vary and can swing the cook temp by 10-20+ degrees when cycling. However, this will be OK since you have a long, slow cook and a large roast.
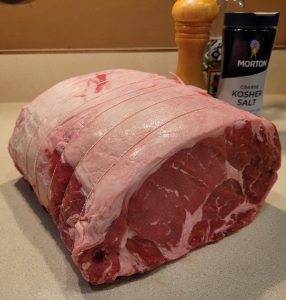
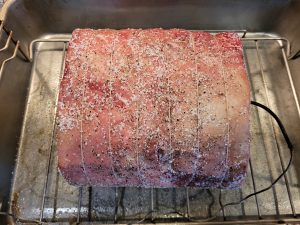
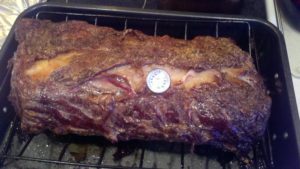
4.) Season the rib roast generously with course kosher salt and fresh cracked black pepper on all sides. Add sweet basil, rosemary or other herbs if you desire. Place in a V-rack roasting pan set with the fat cap facing up. The fat will melt into the beef and add to the tenderness of the final product. Place a temperature probe (Maverick PRO-Series XR-50) in the center of the rib roast to monitor the beef’s internal temperature. Place in the oven and cook until the center of the roast registers 6-8 degrees less than the doneness that you desire. For a full sized (12+#) roast in a 170°F oven, this will take around 5 to 6 hours. Very important to monitor the temp as the roast cooks (ovens vary!), but don’t open the oven door until you reach 6-8 degrees less than your desired final degree of doneness!
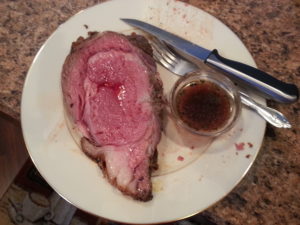
Rare (cool red)=125* Medium Rare (warm red)=135* Medium (warm pink)=145* Medium Well (slightly pink)=150* Well Done (no pink)=160+*
NOTE: The “cook slow, finish high” method will not produce much drippings. The idea is that the juices stay INSIDE the rib roast. If you need to whip up some au jus, always use a meat-first beef base and a little Kitchen Bouquet for color.
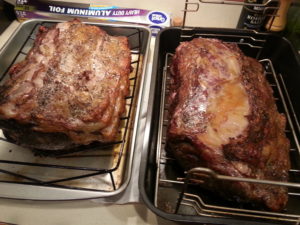
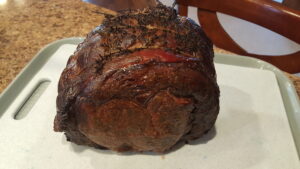
5.) Remove the rib roast from the oven, lift the V-rack with the roast out of the roasting pan and transfer it to a cutting board/drip tray combo, and tent tightly with aluminum foil. Place in a warm spot in the kitchen for at least 30 minutes to allow the juices to redistribute. The roast’s internal temperature may go up an additional 8-10 degrees and then start to drop.
This is an opportunity to adjust your timing depending on how things are going with your guests. The rib can rest under the foil for quite a while, up to an hour. Once you complete the next step, you are pretty much committed to serving immediately.
While the roast is resting, increase the oven temperature to highest possible setting (500°F to 550°F).
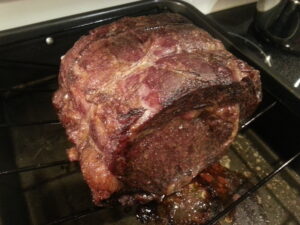
6.) Drain whatever drippings are present into your au jus pan and wipe out the roasting pan with a paper towel. Remove the foil tent and return the V-rack with the rib roast to the roasting pan. At 10 minutes before guests are ready to be served, place roast back in the 550 degree oven and cook until well-browned and crisp on the exterior, 6 to 10 minutes. Remove from oven, carve, and serve immediately.
BE WARNED…unless your range hood is vented outside, you will probably experience your smoke alarms raising hell. I usually have somebody standing by to wave the dish towel or press the alarm silencer to avoid panicking the guests.
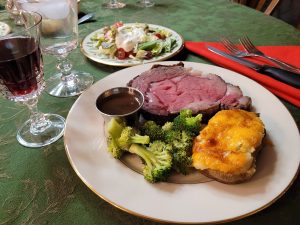
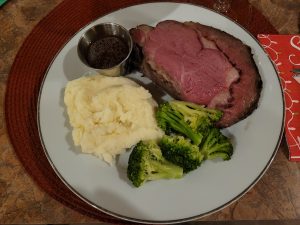
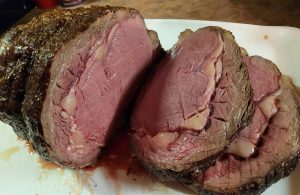
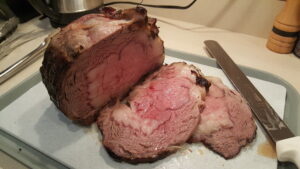
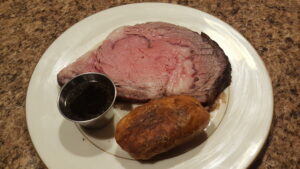
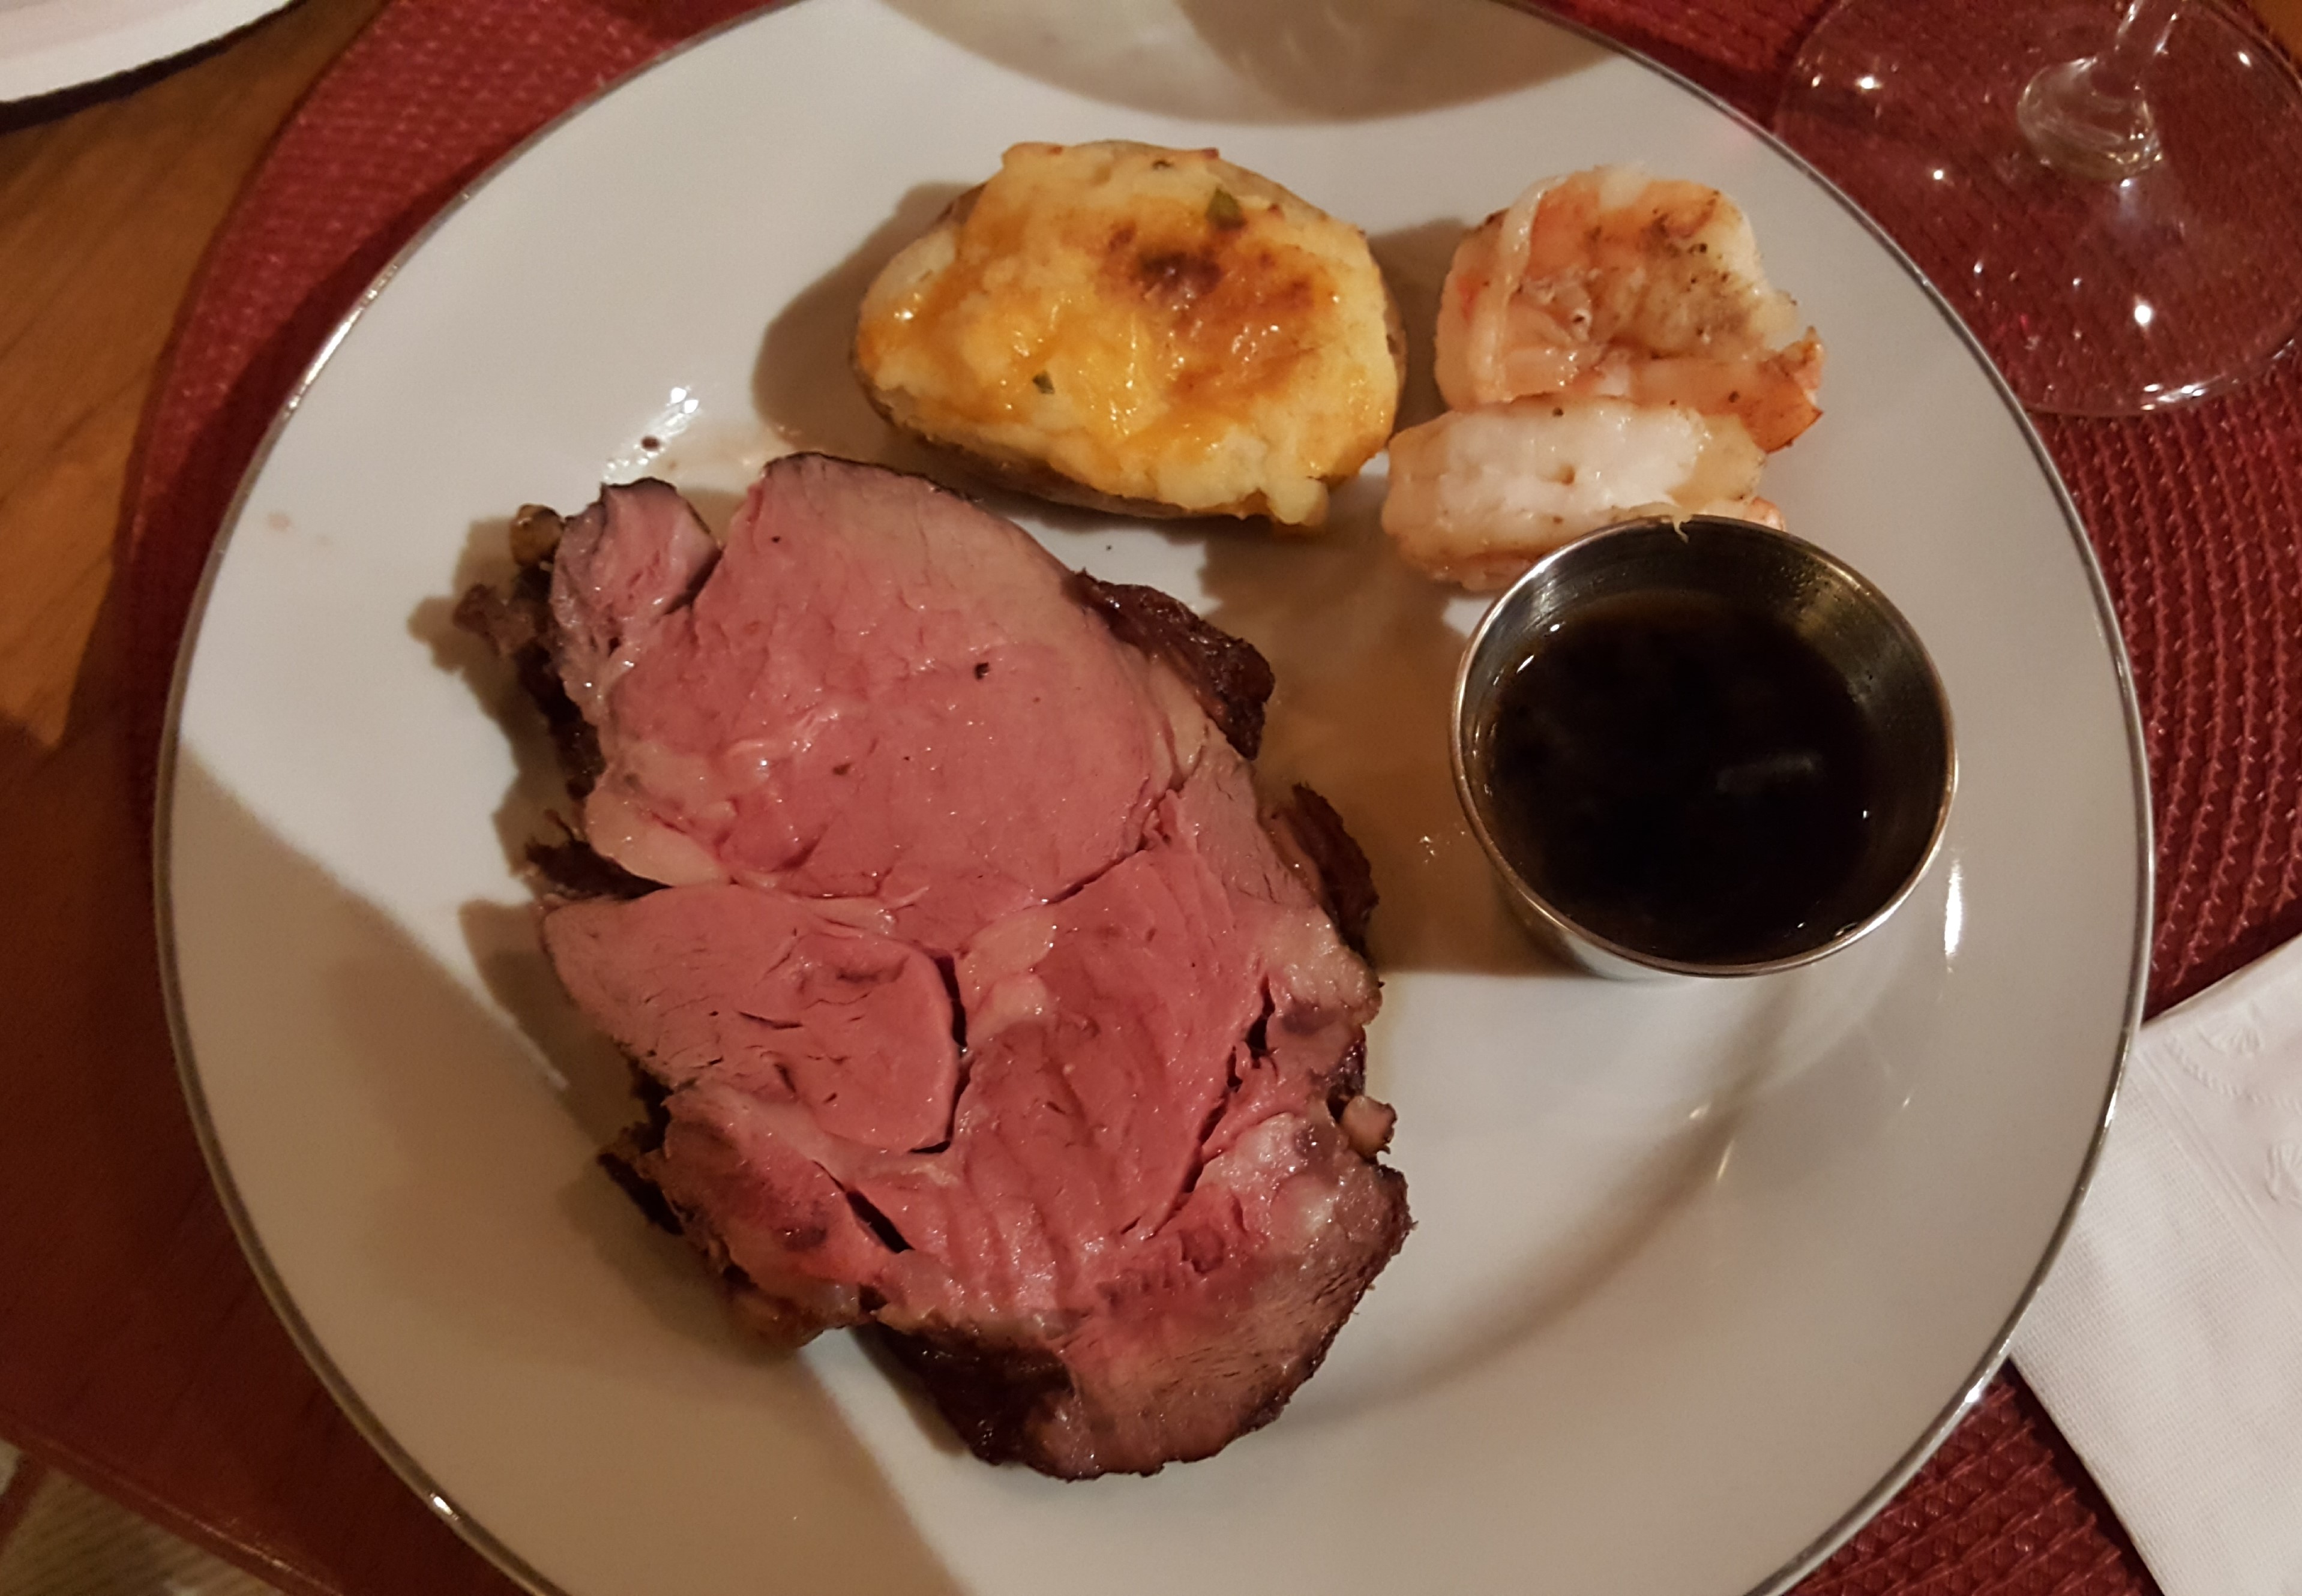
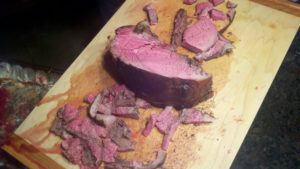
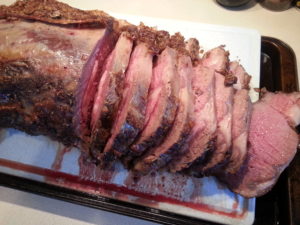
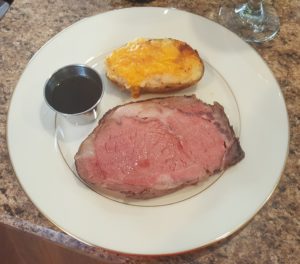
7.) A couple of carving tips: Use a very sharp carving knife. Have a warm, damp towel in case you need to clean the handle as you carve. If you are carving a whole rib, cut in half and carve one half at a time. Work each end of the half, depending on the doneness the guest is requesting. More well done will be on the end, rarer in the middle. Carving sizes will depend on your guests, and the diameter of the prime rib. I try to slice around 8 oz. so guests can have additional portions if they desire.
8.) When you serve, have a shallow pan with simmering (not boiling) au jus on the stove to cook up portions that guests desire want more done. 20-30 seconds a side should do it.
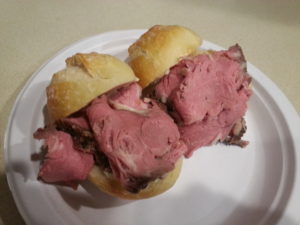
LEFTOVERS? Wow, I hope not. If you end up with extra portions that you can’t eat over the next day or so, I have a good way to handle them.
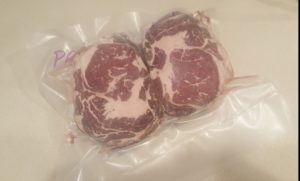
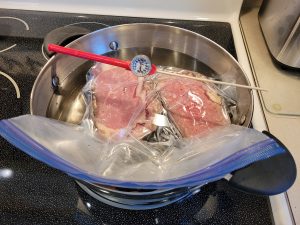
Seal the portions (no more than two 8-12 oz. in a packet) and freeze. I use a vacuum sealer, but a gallon Ziploc bag will work, too. When you are ready for Round 2, completely thaw the portions and and lay side-by-side in a fresh gallon Ziploc bag.
Execute a “poor man’s” sous vide. Fill a medium sized stock pot with warm water (100-120 degrees) and place on low. Place the bag into the water. Squeeze out the air (done by carefully submerging the bag, leaving an open corner out of the water and sealing the zip as the pressure forces the air out). Keeping track of the water temp, slowly warm the bag to a target temp just below the original rib temp (takes maybe an hour or so). Gently flip the bag every 15 minutes to stir the water. My original rib temp was medium rare, so I heat my leftover portions to no more than 128 degrees. Because this is like sous vide cooking, it can stay in the water a long time, as long as the water stays at or below the target temp. Don’t overheat the water! If you rush the process, you will trash the meat. Take your time and let the meat come to temp, slowly. This method is better than overcooking portions in the oven or microwave. Done with patience, your leftovers will be as tender and flavorful as they were the first time.